Tagging Nodes
Use Tag to create a label for any selection of nodes. This lets you group any set of nodes that you consider related in some way. To create a tag, you must first select nodes, then use the Tag icon in the context menu to show the ManagerTags dialog. You can then:
Create a new tag for the selected nodes.
Add (or remove) selected nodes to an existing tag.
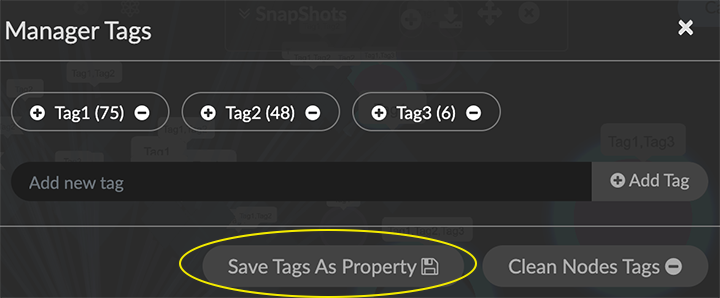
Use Save Tags As Property to add the temporary property _graphxrtags to all currently tagged nodes. When a tag is deleted, the property is removed from its tagged nodes.
Use Clean Nodes Tags to delete all the tags on selected nodes.
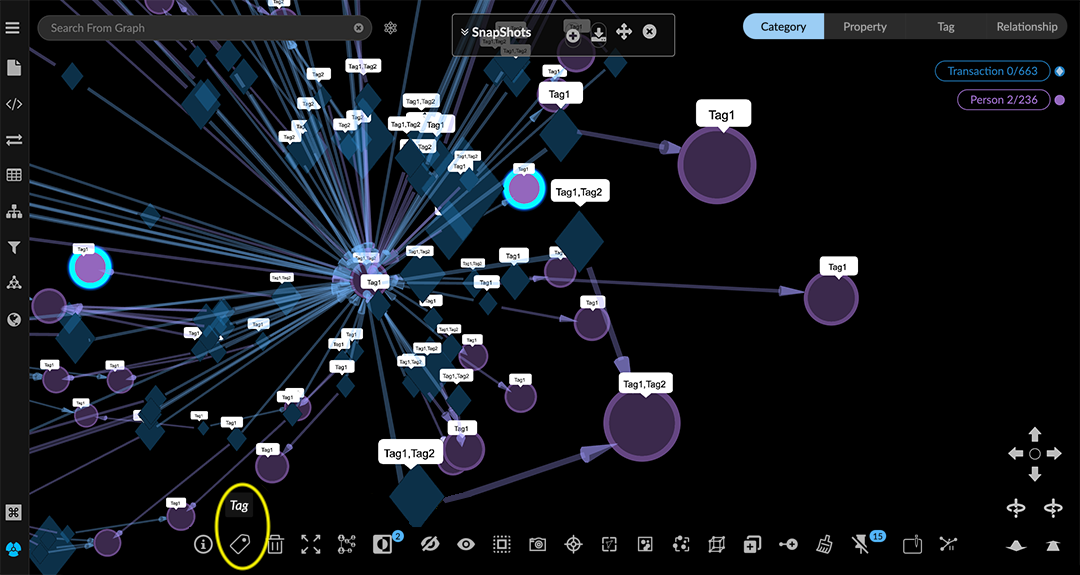
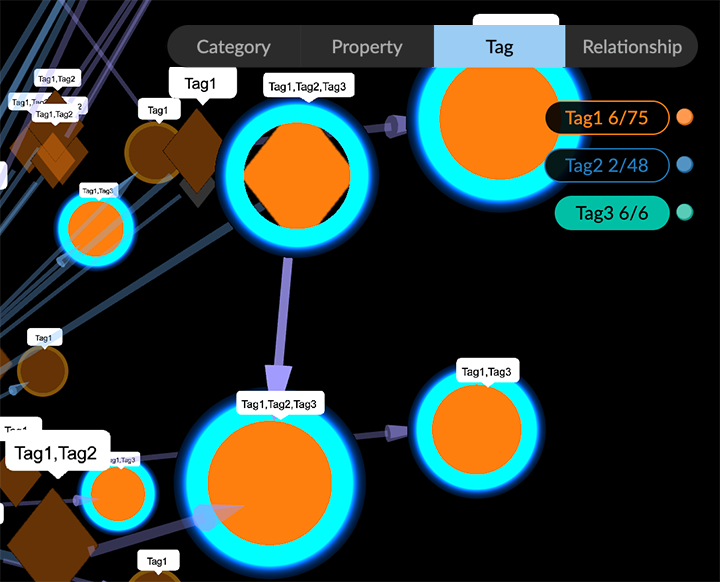
Tags are listed in the Tag legend. Each tag bubble shows a tag name, number of nodes with that tag, and the number that are currently selected. GraphXR automatically assigns a color for each tag. You can click the colored dot next to a tag bubble to set the color and icon displayed on tagged nodes when you click Tag in the legend.
In the graph, a tagged node also always displays a small white badge listing its tag names.
You can add more than one tag to a node.
Creating a new tag
To create a tag:
Select one or more nodes using any selection method.
In the context menu click the Tag icon or, in the right click menu select Actions>Tag to display the Manager Tags dialog. Existing tag names are displayed along with the number of tagged nodes for each.
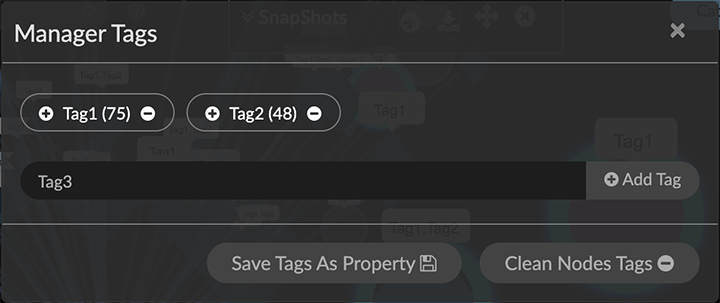
Enter a unique name for the tag in the text box and click Add Tag.
The new tag name is displayed above the textbook. It includes the number of nodes which have been given that tag. In the graph, the tag label appears on the selected nodes.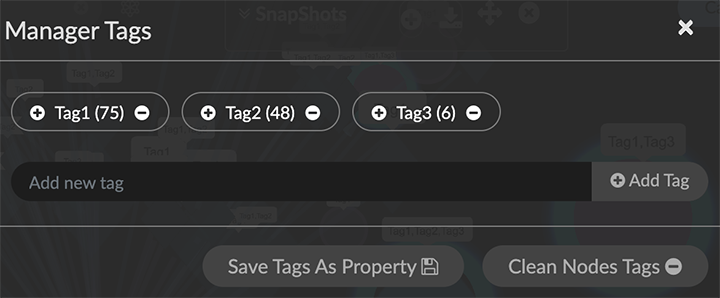
Click the X at the top right to dismiss the Manager Tags dialog.
In the graph, the tagged nodes are still selected.Click Tag in the legend to see the new tag on the list.
The tag name is displayed, along with its number of nodes. You can use this to check that you've tagged the expected number of nodes.
In the legend, tags are listed in order of the number of nodes in the tag.
Adding or removing a tag
To add or remove a tag:
Select a group of nodes using any selection method.
In the context menu click the Tag icon or, in the right click menu select Actions>Tag to display the Manager Tags dialog.
Locate a tag name and either:
Click the + icon on the tag label to add the tag to the selected nodes.
OR
Click the - icon on the tag label to remove the tag from the selected nodes.The number of tagged nodes for that tag is immediately updated. If the tag has been removed from all nodes, the tag name disappears from the dialog.
Click the X at the top right to dismiss the Manager Tags dialog.
Cleaning all tags from selected nodes
You can remove all the tags from any selection of nodes in one step, rather than having to select nodes with specific tags and then delete the tags individually.
To clean tags from selected nodes:
Select a group of nodes using any selection method.
In the context menu click the Tag icon or, in the right click menu select Actions>Tag to display the Manager Tags dialog.
Click Clean Nodes Tags.
• All of the tags applied to those nodes are removed.
• In the graph, the tag label disappears from the selected nodes.
• In the Manager Tags dialog and in the legend, the total number of nodes for each tag is updated. If no nodes remain, the tag is deleted.
Saving tags as a temporary property
Optionally, you can click Save Tags As Property to add the temporary property _graphxrtags to all currently tagged nodes.
When a tag is deleted, the _graphxrtags property is removed from its previously tagged nodes.
To save tag names as a temporary property:
Select any node to display the Tag icon in the context menu. Click the Tag icon or, in the right click menu select Actions>Tag to display the Manager Tags dialog.
Click Save Tags As Property.
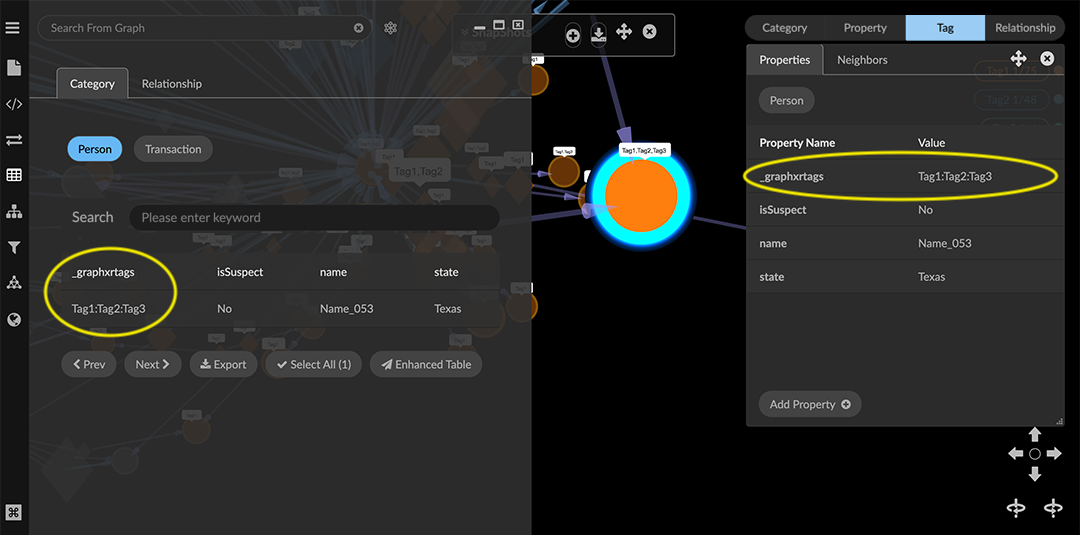
A message displays indicating success, and the _graphxrtags property is added to all tagged nodes, with the tag name as its property value.
The _graphxrtags property value for a node with more than one tag is a list of the tag names separated by colons.Click the X at the upper right to dismiss the Manager Tags dialog.
To view the temporary _graphxrtags property and its values you can:
• Display an an information window (Ctrl+I) or quick info rollover:• Open a Table for a group of selected nodes.