
Adding and Deleting Graph Data
At any time you can create new nodes and edges in the project space. Since graph data is extensible, you can add nodes and edges of new as well as existing categories or relationships.
You can:
Add new nodes to the graph, using the Add Node toolbar icon

or Add Node on the the right-click menu.
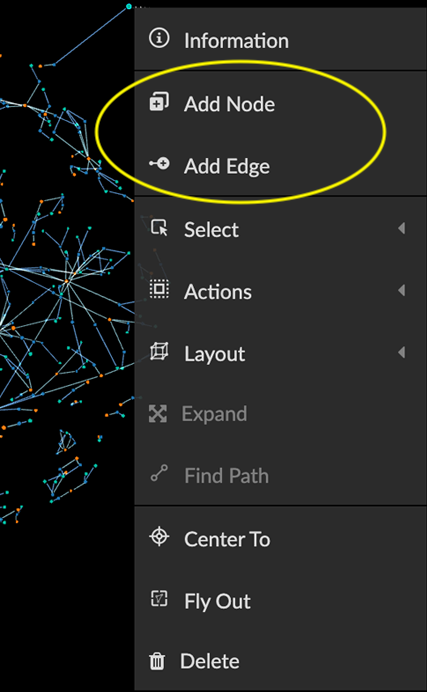
Connect selected nodes using Add Edge toolbar icon or Add Edge on the the right-click menu.
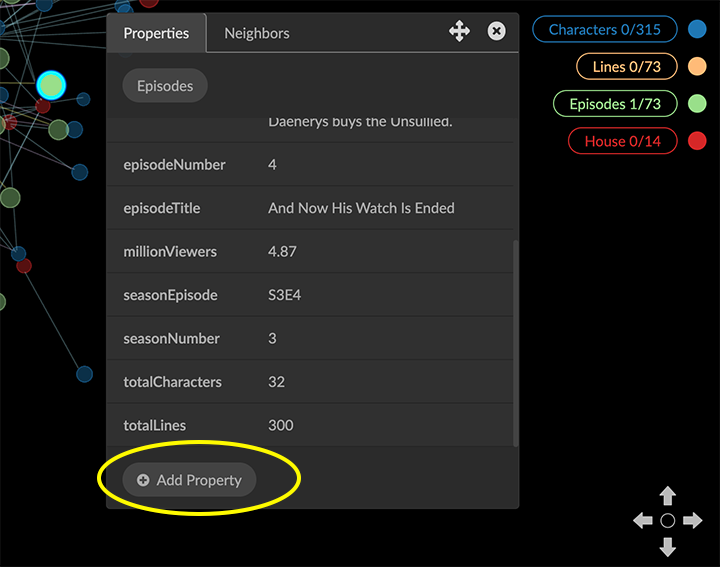
Add new properties to a node or edge using Add Property in its Information window.
To delete data from the graph space you can:
Delete any data selection using the Delete icon, Delete on the right-click menu (or the del or backspace keyboard shortcuts).
Delete all the data in the graph space using the Clear icon (ctrl+shift+C).

You can use ctrl+Z to undo any number of Delete or Clear actions.
Adding a node
You can add new nodes directly in GraphXR, one at a time, using the Add Node icon in the context menu.
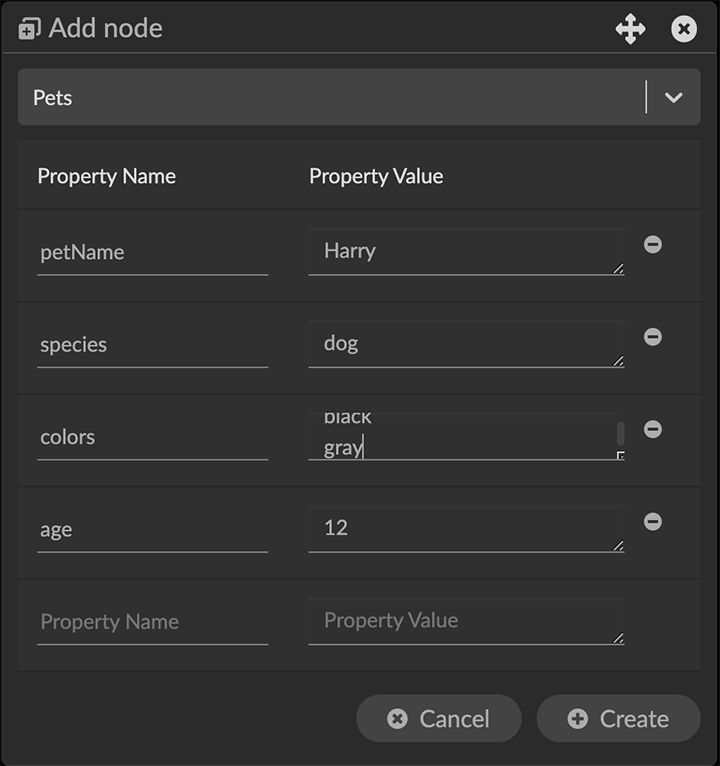
For example, we notice that a Game of Thrones character owns pet dogs called Harry and Rufus. So far, the data set doesn't include anything about animal roles. For each pet, we can quickly add a node (and, for the first one, create a new Pets category with initial properties such as the name, owner, age, url image, species, breed, and colors of the pet).
In many situations, you only enter one value for a property. However, GraphXR does allow entry of multiple values for a single property. Such multiple property values are displayed on separate lines, and are displayed in captions.
To add a node:
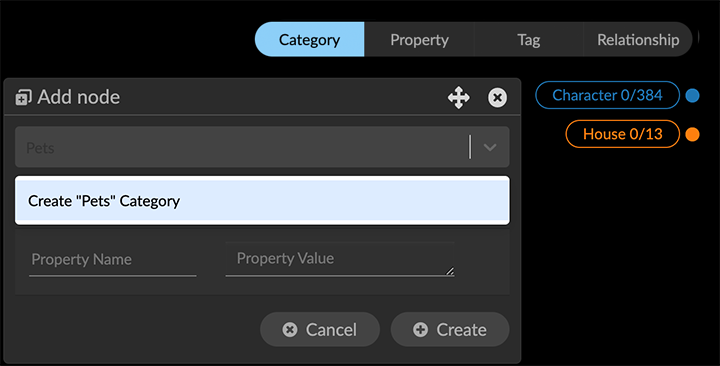
Click the Add Node toolbar icon or right-click menu item to display the AddNode dialog.
Use the dropdown menu to select an existing category for the added node, or enter a new category name (e.g. Pets) and press return.
Enter one or more Property Names for the category (e.g. petName, etc.), and enter its corresponding Property Value (e.g. Harry) or values (e.g. black and gray). To enter multiple values, enter the first value then press return to enter the next one, and so on.
OR
In the list of properties for an existing category, enter a Property Value if you have one, add any additional property names and their values, and click the minus (-) icon for properties for which you have no value.
NOTE: The other nodes of an existing category will be updated with any new property names you add, but the values will be null. You can display an Enhanced Table and edit it directly to enter missing values. You can also display an Information window (ctrl+I) for a single node or edge to edit its property values.Click Create to create the node.
The new node appears in the graph space. A new category will appear in the Category list in the legend. For an existing category, the total number of nodes is updated.
Adding Edges
Using Add Edge, you can connect selected nodes to each other with edges of a new or existing directed relationship. To do this, you’ll select nodes as the source, and then the nodes that are to be the target.
You can add properties and single or multiline property values to edges just as you can for nodes.
To add edges to nodes:
Using any selection method, select one or more nodes that you want to connect to other nodes via a directed relationship.
Click the Add Edge toolbar icon or select Add Edge from the right-click menu. In the Add Edge dialog, either enter the name of a new relationship to be assigned to the new edges (e.g. OWNED_BY) and press return, or select an existing relationship from the dropdown menu.
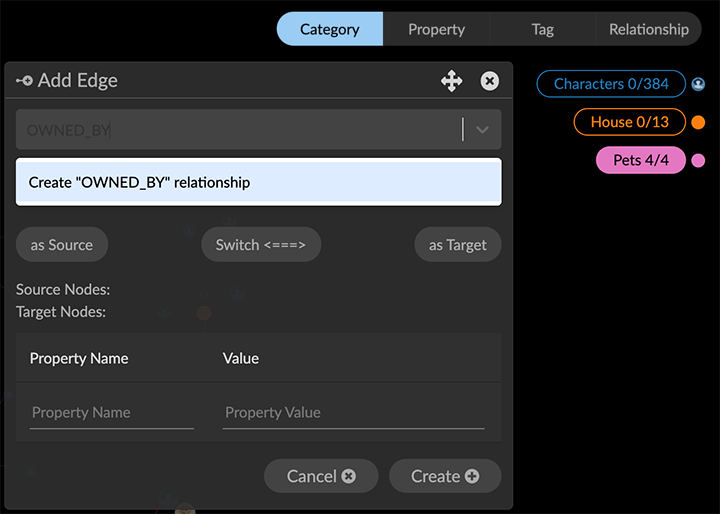
Optionally, enter property names and their values for the relationship.
Click as Source to list the nodes that will be sources for new edges.
Now select one or more target nodes for the edges and click as Target.
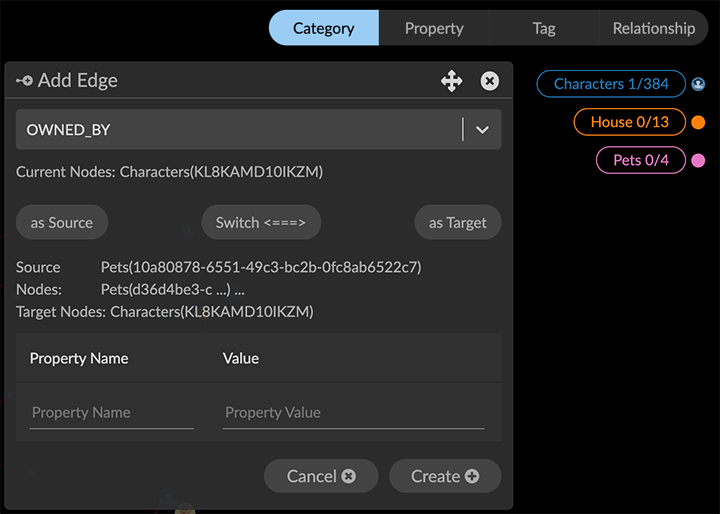
If you've set the source and target backwards, click the Switch button to reverse the two.
Click Create.
New edges are created connecting the source nodes to the target nodes, with arrows showing the direction of the relationship. The total number of edges of that relationship is updated in the Relationship list in the legend.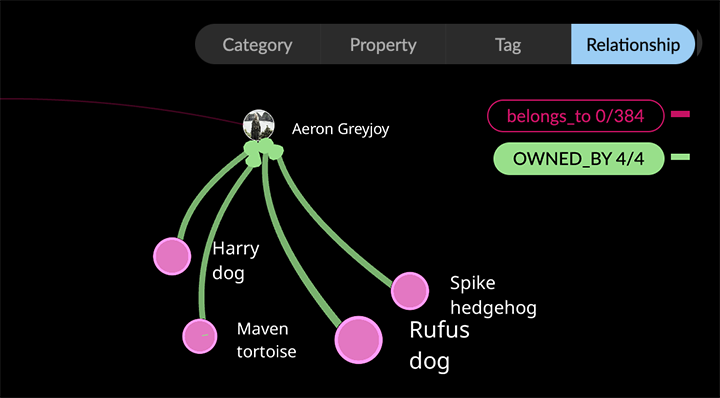
Editing a property value
You can edit any property value of a single node or edge in its information window. This lets you correct errors or add missing values to a very small amount of data.
To edit a property value:
Double-left click a single node or edge to display its information window (or select the node or edge and click its Information toolbar icon, or choose Information from the right-click menu).
In the list of properties, double click a property Value, and edit the value (or values) in the provided text field.
The property value is updated as you enter it.
Click elsewhere in the list to save the new property value.
Adding new properties to a node or edge
You can add one or more new properties to a single node or edge using the Add Property button in its Info window. Adding properties and their values to one node or edge at a time in GraphXR is impractical for large amounts of data, but it can be useful for modeling and testing very small amounts of data, or for adding a small number of missing properties and their values.
When you add a new property to a node or edge, all the other nodes of that category or edges of relationship are updated with the new property name, but with null values. To update a larger number of missing values more efficiently, display an Enhanced Table and edit values directly.
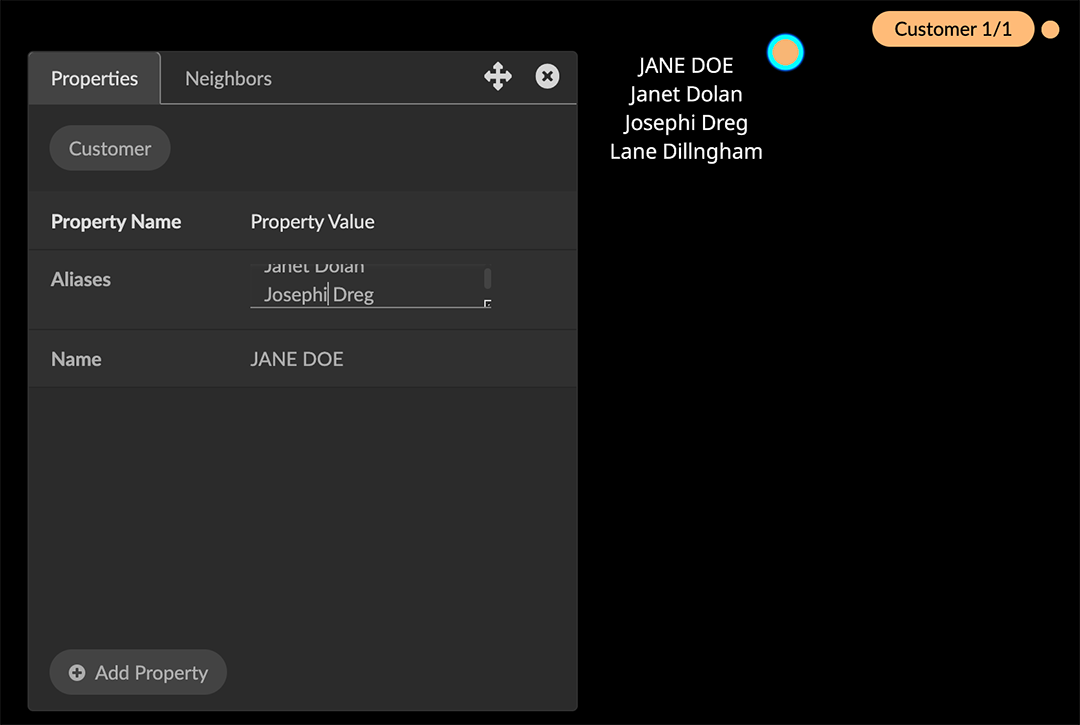
For example, we can add a property for a mobile number to a Customer node that includes name and aliases properties. Captions on the customer node are currently set to show the name and the aliases.
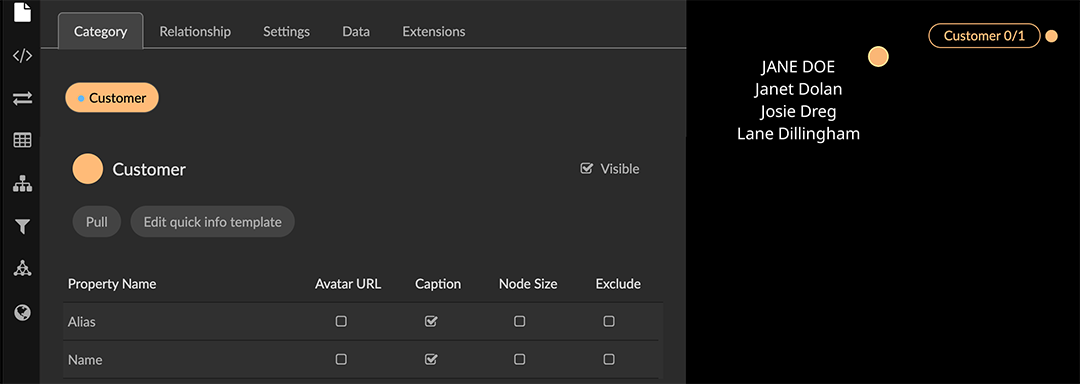
Once the mobile number property is added, we can go to the Customer category in the legend, click to open its styling dialog, and in the Caption tab, replace or add the new property as a caption. Or, in the Project panel and Category tab, use its Caption checkbox to select it as a caption.
To add a new property and property value:
Double-left click a single node or edge to display its information window (or select the node or edge and click its Information toolbar icon, or choose Information from the right-click menu).
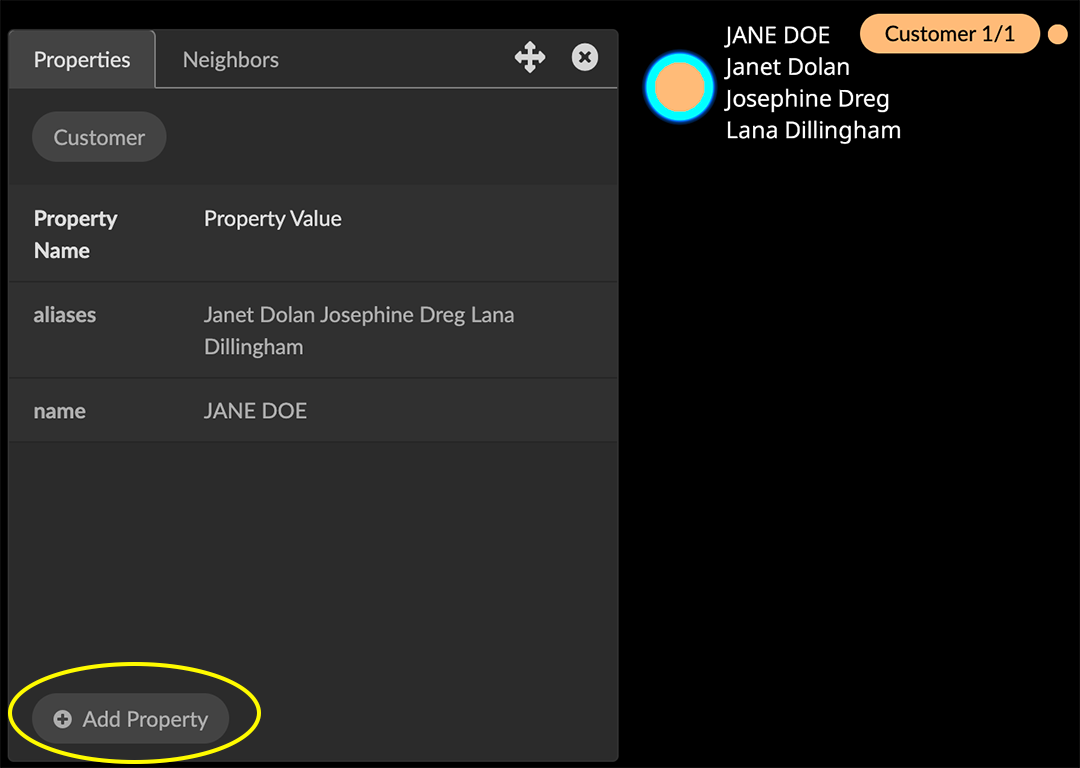
Click the Add Property button, and enter a Property Name (mobile) and one or more Property Values (a mobile number) in the provided text fields.
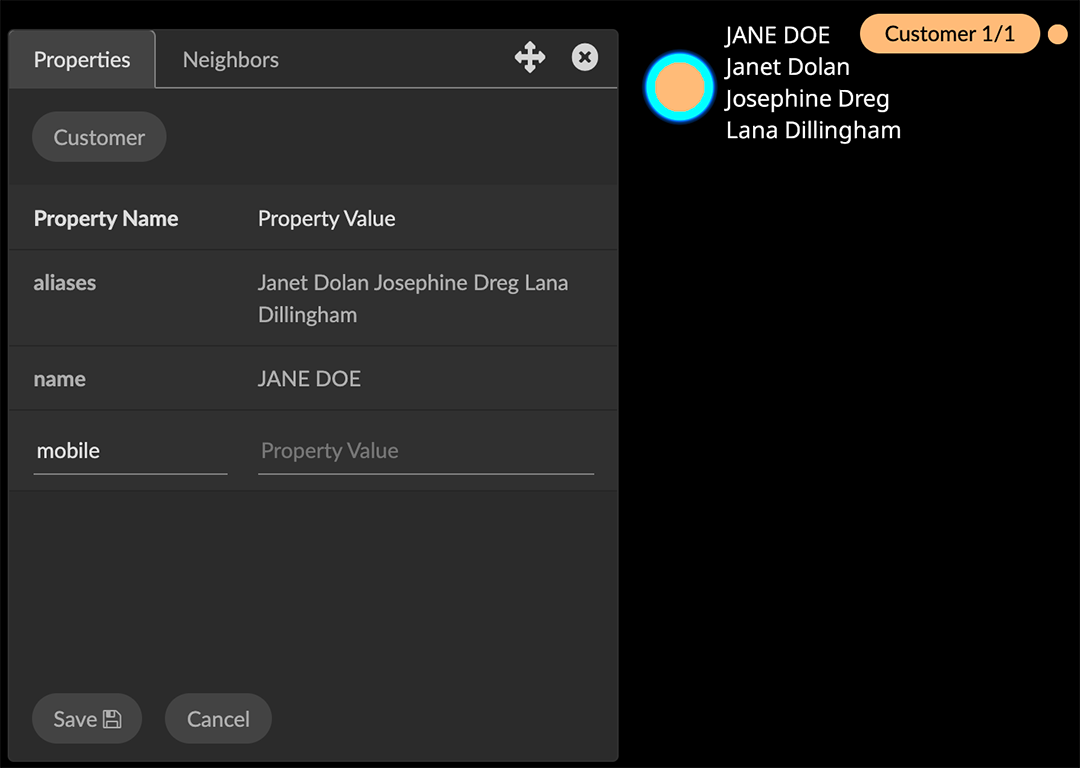
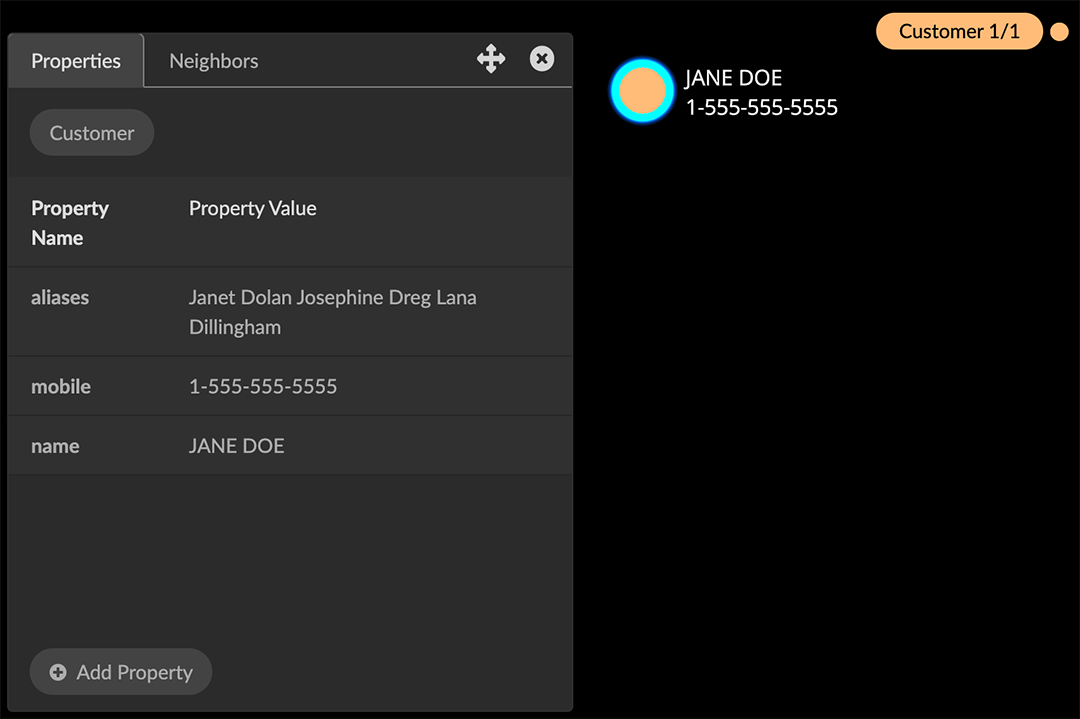
Click Save to save the new property and property value, or Cancel to exit without saving.
The information window is updated with the new property and values.Now we can use the Caption tab in the category’s styling dialog to set the mobile property as the second caption for Customer nodes.
Deleting data from the graph space
Deleting data from the graph space is easily done. You can:
Delete any data selection by pressing del or backspace keyboard controls, clicking the Delete toolbar icon, or choosing Delete from the right-click context menu.
Delete all the data in the graph space using the Clear toolbar icon (ctrl+shift+C). This action is available using the toolbar icon, but not the right-click menu.
You can use ctrl+Z to undo any number of Delete or Clear actions.
Deleting data in the graph space does not delete data you pulled from a Neo4j database. The data model persists, and the Categories and Relationships tabs in the Project panel still list your defined entity labels.
On the other hand, editing and transformations done in your GraphXR project will be lost unless you save data before deleting it. You can save data back to Neo4j, save a data View or Snapshot, or export data in a variety of formats.