
Filtering Graph Data
The Filter panel lets you filter data by any continuous or categorical property value using multiple composable filters. An individual filter operates on a single property of either nodes or edges. Each filter includes independently set controls to filter data further. Creating multiple filters that operate at once lets you select data with any combination of properties (for example, userID, transactionAmount, dateTime, city, etc.).
Since property names don’t have to be unique across a data set, filters display the categories (for node properties) or relationships (for edge properties) that include the property name you select. You can click to de-select the categories or relationships you don’t want to filter.
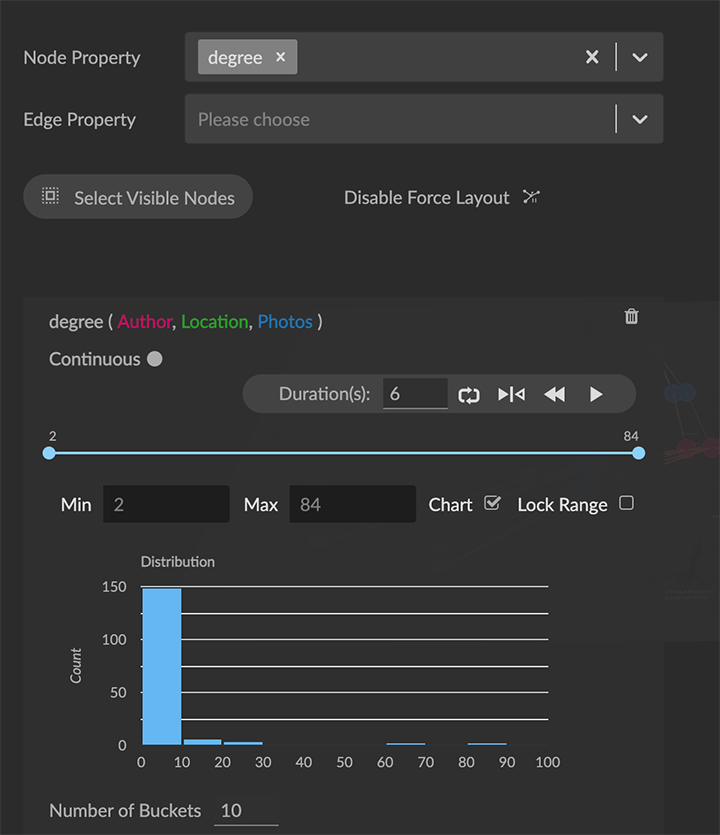
For continuous property values a slider and animation control is provided, and a live histogram of currently filtered data is displayed.
You can:
Use the slider control to filter data with a selected range of property values.
Enter Min and Max property values to be displayed, and use the Lock Range checkbox to set a range of values to be displayed at one time.
Use the animation playhead to play through values or ranges of values. You can control the duration and direction of play, or continuously loop through the filtered data.
Click a filter’s Chart checkbox to hide the live histogram.
Click the Continuous/Categorical toggle to use a categorical filter for numerical property values. For example, generated degree numerical property values are integers (whole numbers) but it can be useful to filter them as though they are strings.
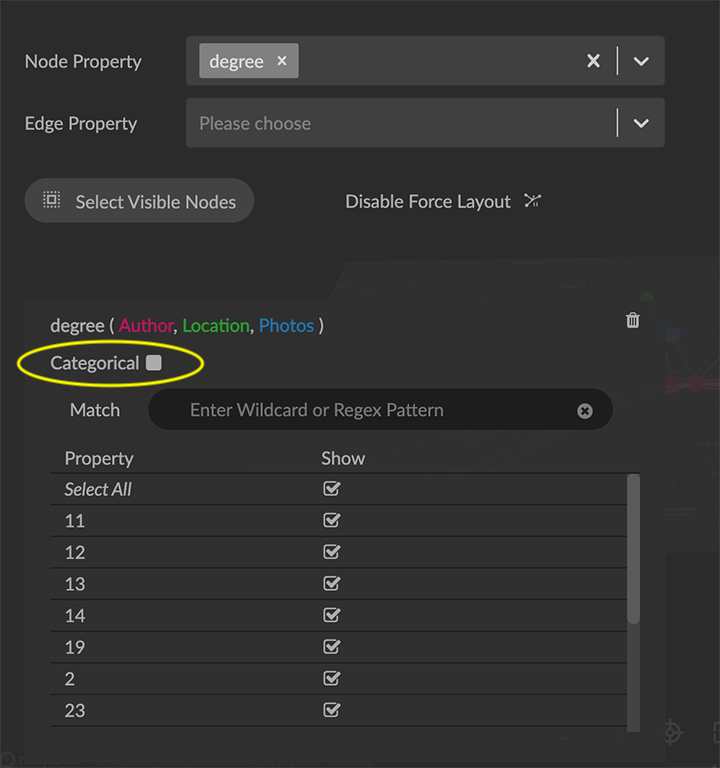
For categorical (i.e. text or numerical string) property values, a list of unique values is displayed, each with a selection checkbox.
You can:
Use checkboxes to select one or more values from the list.
Use the Select All checkbox to select or deselect all values at once.
Use the Match search bar to enter a search term or a regular expression (regex) to select data with matching property values.
Numerical values entered in string rather than numerical format can be converted using an f(x) function in the Transform panel. For example, timestamps must be formatted as YYYY-MM-DD hh:mm:ss, and you can do this using a transform.
Data that meet filter criteria remain in the graph space. At that point, you can:
Save the filtered graph as a data view, GXRF file, or Snapshot. Filters do not persist when you leave a project, but a saved view, file, or snapshot archive does include existing filters.
Select filtered data using any selection method. To select all the filtered data, use the Select Visible Nodes button in the Filter panel, the Select Visible Nodes toolbar icon, or the right-click Select>All Nodes menu item.
Clear the filters to restore the data you started with.
Using multiple filters
This example uses a dataset of a television series viewership per episode displayed in a parametric layout. We can create a numerical filter by date, then add a second text filter that operates on the description of the episodes.
In the Filter panel, multiple filters are displayed in alphabetical order by property name.
To filter data using multiple filters:
Open the Filter panel, and from the Node Property menu, choose the timestamp property episodeAirDate.
The filter is labeled with the property name and the categories or relationships where that property is defined. This property is found only in the Episodes category.
- A slider shows the range of the timestamp values.
- Min and Max dialog boxes show the minimum and maximum values in the currently filtered data.
- A Chart displays a live histogram of the currently filtered data.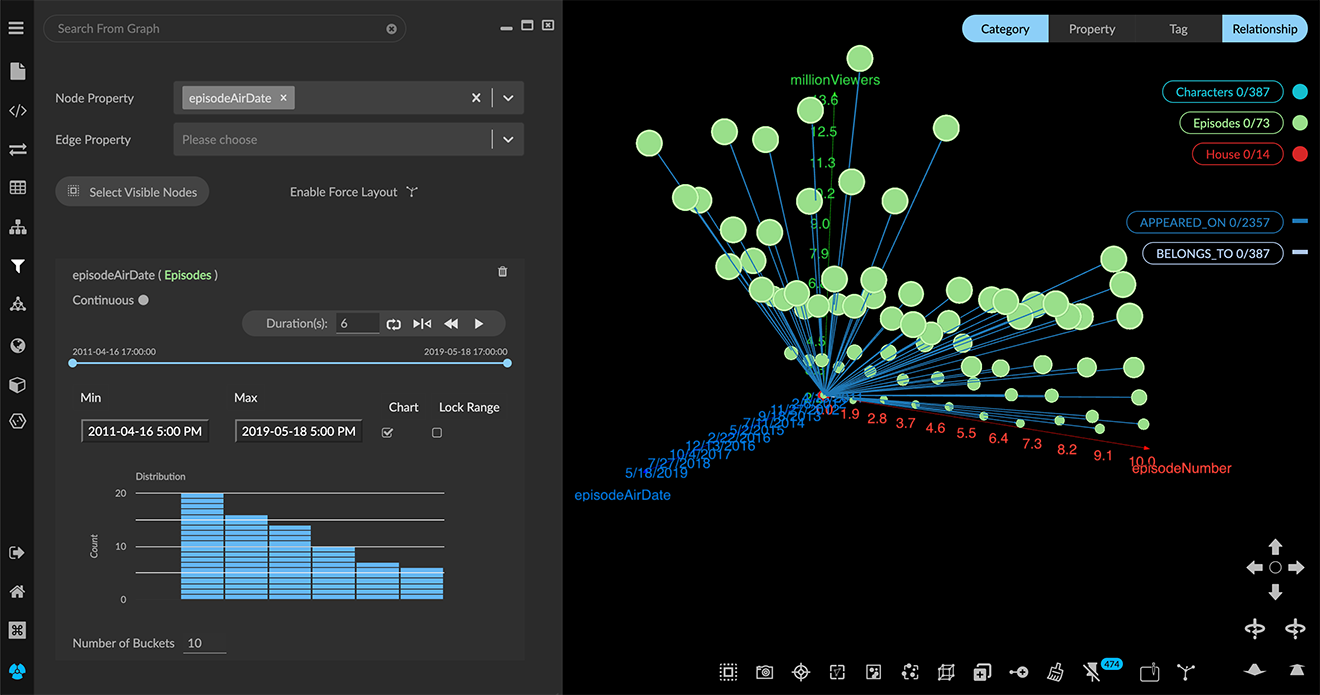
Enter a range of dates using the Min and Max selectors below the slider. For timestamp values, you can click to display a calendar and select dates. Optionally, you can:
- Click the Lock Range checkbox to lock a range of values (for example, a year, month, or week), then use the slider or animation playhead to filter using that range.
- Click the Chart checkbox to hide the live histogram.
- Use the slider control to filter data.
- Use the animation playhead to play through filtered values automatically. You can enter an overall duration, play forward or in reverse, pause, or continuously loop through the values.
For a second filter, select the episodeDescription property form the Node Properties menu.
The values for this property are encoded as text strings, so a categorical filter is automatically created. You can
- Un-check items in the list to filter them out, or the Show All checkbox to filter out all the data at once.
- Enter a search string in the Match search bar. For example entering Arya (the name of a character in the series) keeps Episode nodes where the episodeDescription property value includes the string Arya.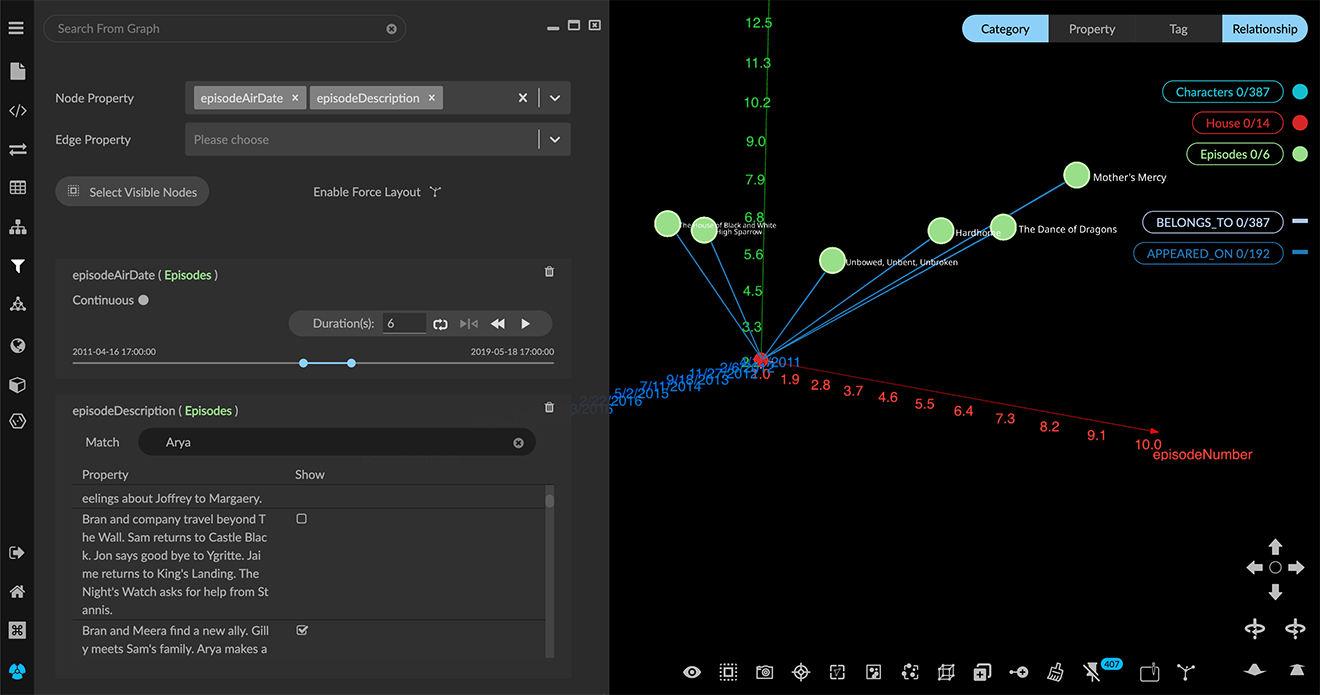
- In the search bar enter a regular expression (regex), for example (Arya.*Braavos) keeps Episode nodes where the episodeDescription property value includes the string Arya followed anywhere in the text by the string Braavos (a place name in the series).
For information about valid regex, refer to https://developer.mozilla.org/en-US/docs/Web/JavaScript/Guide/Regular_Expressions
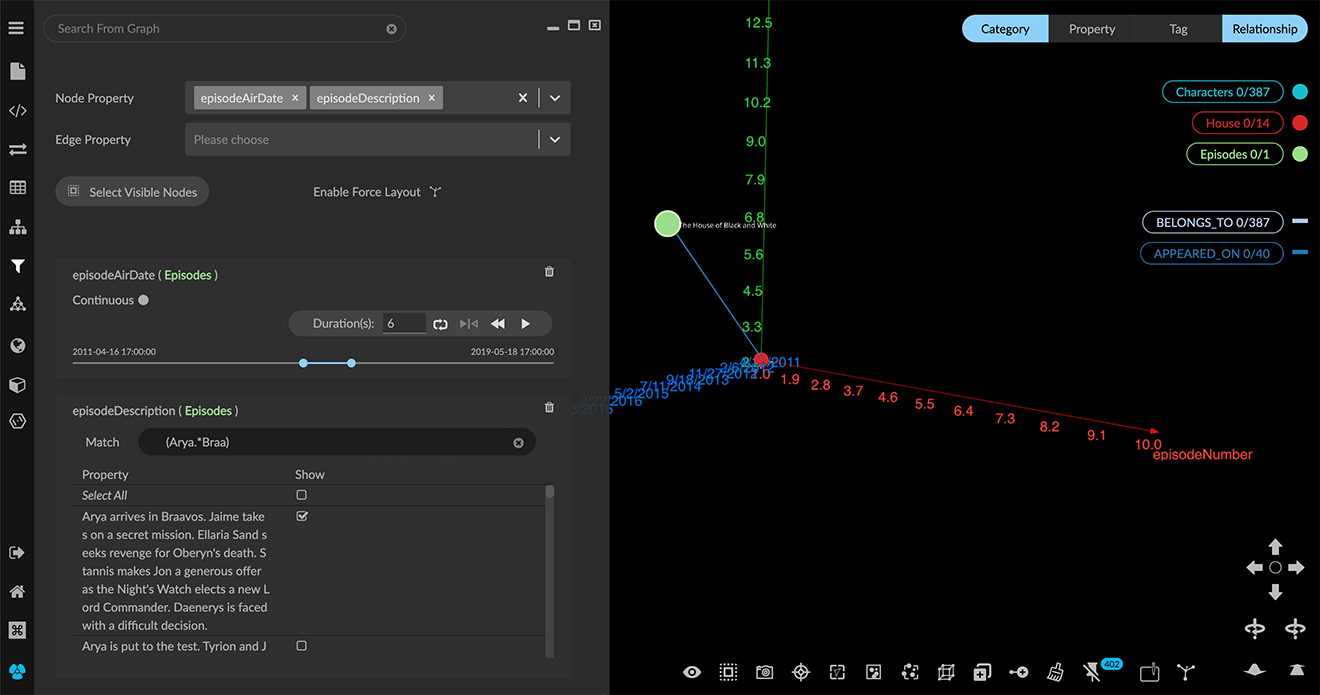
The view in the graph space now includes only the filtered data. List items in the legend are updated.
You can dismiss the Filter panel and continue working with the filtered data.
Filters do not persist when you exit a project. They do persist in saved data views, Snapshot archives, or .GXRF files.
Clearing a filter
Filters simply display the data that match the criteria in the filters you have created. Filtering does not delete data. To restore filtered data, you must clear (i.e. delete) the filter that is acting on it.
The Show Hidden function from the toolbar or right-click menu may appear to be active, but it does not restore filtered data.
To clear a filter:
On the filter, click the trash can icon to the right of the property name.
ORIn the Node Property or Edge Property menu, click the x on the property name.
Using Select Visible Nodes to select and delete data
Filtering by itself does not select or delete data. You can use Select Visible Nodes to select all the visible data. Then, with the filtered data selected, you can simply delete it, or, conversely, clear the filters and invert the selection to delete data not shown by the filters.
To delete visible data shown by filtering:
Click Select Visible Nodes (the data you want to delete) select Delete on the right-click menu, or press del or backspace.
The visible nodes and any connected edges are deleted and the graph space now appears empty.
To restore the remaining data, clear the existing filters. Click the trash can icon to the right of all the filter property names, or in the Node Property or Edge Property menu, click the x on the property names.
To delete the data not shown by filtering:
Click Select Visible Nodes (the nodes you want to keep).
With the filtered data still selected, clear the existing filters by clicking the trash can icon to the right of all the filter property names, or the x on the property names in the Node Property or Edge Property menu.
All the data appears, with the filtered nodes you want to keep still selected.Invert the selection by clicking Inverse (Ctrl+I) or the right-click menu’s Select>Invert item. Now data that was filtered out is selected. Select Delete on the right-click menu, or press del or backspace to delete it.